
The key to a limitless mind is already in your mind.
On this blog, we provide the mindset tools, affirmations, and wisdom to help you turn that key.
Explore Articles

083: 6 Ways to Save Time in Your Business with Squarespace Scheduling
6 Ways to Save Time in Your Business with Squarespace Scheduling
Workflows. Processes. Systems.
Making the most of these will surely help you save time and streamline your business. But what if you can use a tool that not only saves you time but also opens up a streamlined way to generate new revenue in your business?
Enter Squarespace Scheduling.
Workflows. Processes. Systems.
Making the most of these will surely help you save time and streamline your business. But what if you can use a tool that not only saves you time but also opens up a streamlined way to generate new revenue in your business?
Enter Squarespace Scheduling.
As you may know Squarespace Scheduling is an app that’s integrated with Squarespace and I want to show you a few ways you can optimize it for your business. Those of you who are using Acuity Scheduling, this applies to you as well.
1. Book Complimentary Client Acquisition / Consultation Calls
After a potential client fills out an inquiry form to work with me, I invite them to book a complimentary consultation call. I have my availability set up there beforehand and clients can see which times and dates work for them. If I am in talks with the client via email and we agree on a date and time, I simply send an invite to them directly from the scheduling app by simply adding in their name and email and date of appointment. Since I have zoom integrated with scheduling, I can save time by not having to create or schedule meeting in there. Plus, clients get an automated email with link, date and time all in one.
I email my clients this link: https://sophiaojha.com/book-your-consult-call
It looks like the image you see on the right.
Click the image to go see the direct link live.
2. Book Paid Consultations
I don’t use this so often myself yet because clients often purchase a package with me which includes both implementation time as well as video consults and so I play it by ear and send them a zoom link for our meetings. But I have it set up just incase clients wanted to book right away. So if you wanted to block off set number of hours each week for paid consultations, this would work really well. Again it is all integrated with zoom and you preset your availability in the Scheduling calendar.
3. Book a Room or Facility
This is perfect if you have a facility where you book out different areas. I recently set up scheduling for a Canine Learning Center where their clients can book an indoor diving pool, a training course area and an outdoor pool.
Because of Covid, the owner needs time after each booking to block of half an hour for disinfecting the area and so that can be set up as well so no one can book in that half hour window right after another one client. That’s a super detailed feature that Squarespace Scheduling/Acuity provides and has come in really handy for this client.
You can go see the example live here: https://www.ink9lc.com/


4. Sell Online Zoom Yoga Sessions
Another client of mine is a yoga studio Canada who had to move everything online. Because of the nifty integration with Zoom, yoga studios can create an entire online calendar with all their varied class offerings. Yoga students can select the class they want to join, pay online and get an automated email with their unique zoom link.
The unique zoom link makes sure that only those who have paid can join the event. Plus, the Yoga Studio can creating a waiting room in their overall Zoom settings to admit only those who are on their list, for added privacy/security needs.

This is what the calendar looks like with all the weekly sessions. Check it out live: https://www.jadayoga.com/online
5. Sell Class Cards or Monthly Passes
Another feature of the Scheduling integration is that you can sell Class Cards or Monthly Passes. So for a yoga or fitness studio, this comes in handy. Let’s say the yoga studio offers Hatha Yoga, Iyengar Yoga, Vinyasa Yoga and Kundalini Yoga classes offer by different teachers. Then, they can set up a monthly pass or a weekly pass so that students can pay in advance and select from the different class offerings. Inside Scheduling, you can set up the limit based on the number of classes or the total amount. For example, you can select whether you want to have say 25 classes included in the Monthly Pass or allow students to select as many classes as they like until the value of $125. The app will keep track and once they hit the limit in the Monthly Pass, the students cannot book any more classes. You can also allow for a rollover to the next month of unused time or money. Pretty cool feature!

Check it out at: https://www.jadayoga.com/online
6. Design Consultation and Check-ins with Clients
During my two week design workflow, I meet with my clients on Zoom multiple times. We start off with a first Design Consultation on the first day and we wrap up with a Launch + Training Call on the last day. And in between these two sessions, we can meet spontaneously for quick 10 minute check-ins to review something or clarify a question. For my design clients, I simply email them a Zoom link that can be used repeatedly. But the first and the last consultations are booked via the scheduling app so that they can select a time that fits best for them.
I hope these are some good ideas for you that can help save you time, easily receive payments and streamline your workflow. Let me know if you use this already in your business and what questions you have run into.
Peace,
Sophia

082: How to Open A Free Trial on Squarespace - the Exact Steps Demo
How to Start A Free Trial On Squarespace
It’s important that you get a feel of the website building platform before you go ahead and hire a designer or start building your website yourself. So how do you do that? Start with a 14 day free trial. You won’t need a credit card. Just an email address.
So here’s how.
There are at least 5 good reasons why I think so:
It’s important that you get a feel of the website building platform before you go ahead and hire a designer or start building your website yourself. So how do you do that? Start with a 14 day free trial. You won’t need a credit card. Just an email address.
So here’s how to get started with a new a trial account.
Watch the video or read the article below it.
1| Click on my 14 Day Free Trial Link
Now, if you like my free videos and the help I am providing, you can use my affiliate link to start your account. I will get a little something only if you choose to purchase a plan but it will cost you nothing. So consider starting a trial site from here:
14 Day Free Trial for US residents:
https://www.sophiaojha.com/squarespace-us
14 Day Free Trial of International Residents (Non-US):
https://www.sophiaojha.com/squarespace-world
Alright, now you will land on the Squarespace website. Click on “Get Started”.
2 | Now you go to Templates.
You can either click on one of the categories on the left as your starting point. Or preview the templates here.
Now as of July 2020, what you see here are all Squarespace 7.1 templates. There really is no difference between these templates in terms of what they can technically do. So if you start with any of the templates here and want to create the exact about page layout that is on a particular template, you can do it on any other other 7.1 template. They are all different starting points and you can create what you want with ease. Think of templates as your easy starting points not set-in-stone endpoints.
Just a note, if you know and heard about Squarespace 7.0, the predecessor of 7.1, you can find all those templates down at the bottom of the templates page. Look for the link saying “Looking for earlier versions? Click here” or something along those lines.
Now, when I build new websites I still build them on 7.0 and so do many of my colleagues only because we have found a certain list of things that are better done in 7.0 than in 7.1. But if you are a DIY’er and want to put up a website fast, don’t worry about 7.0. You can choose a 7.1 template. If you plan to hire a designer, know that they may still want to build your site on 7.0 and that’s because they can do a lot more design wise without having to resort to coding.
Alright, so now you pick your 7.1 template or your 7.0 (earlier version) template.
And then follow the directions.
Al’right so that’s it. That’s how you open up your brand new website account on Squarespace. Go ahead and start building your first page on your Squarespace site. And again if you like the free content I am putting out here, consider opening a trial account through my affiliate links (see above). And I thank you a ton for doing so.
Bye for now and see you in the next video!
Al’right, so what’s the next step?
1 | Sign up for my workshop Squarespace Fundamentals
In this 90 minute workshop, I show you how to navigate your new Squarespace website. You will learn how to create a new page, add text and photos and understand how to use the different content blocks. This is a training of the 7.1 version of Squarespace.
See all details of the workshop here.

Get Started on Your Dream!
Start your Squarespace website and let me know how it is coming along. Drop me a line in the comments and share with me what your business is and what you want to create.
Peace,
Sophia

081: 5 Reasons Why I Love Squarespace: The Best Website Builder for Online Entrepreneurs
5 Reasons Why Squarespace Is the Best Website Builder Out There for Online Entrepreneurs
As you might have guessed, as a Web Designer who specialized on Squarespace websites, I am a big proponent of Squarespace for building your online presence. If you are an entrepreneur of any kind - whether you are an author, an artist, or a creator or if you are someone who has an idea, someone who wants to inspire and impact positive change, Squarespace is your platform - the best platform in my opinion and experience.
There are at least 5 good reasons why I think so:
As you might have guessed, as a Web Designer who specialized on Squarespace websites, I am a big proponent of Squarespace for building your online presence. If you are an entrepreneur of any kind - whether you are an author, an artist, or a creator or if you are someone who has an idea, someone who wants to inspire and impact positive change, Squarespace is your platform - the best platform in my opinion and experience.
There are at least 5 good reasons why I think so.
Watch the Video below or Read the Text

1. Squarespace was designed for DIY’ers. (Do-It-Yourself)
Squarespace was designed with you in mind - you, the creative business person and not for designers or developers. You are in the foreground of everything they do. In fact, that’s why they have over 80 professionally designed templates for a variety of niches so that you can pick any one of them and be off to the races. In fact, the newest version, Squarespace 7.1 had made it even easier for DIY’ers to build their website by making it more streamlined and user-friendly.
2. Squarespace customer service and help line
My experience of Squarespace support has been exceptional. You get a lightning fast response and the team is highly skilled not only in the topic but also in customer service skills. I’ve reached out to them and there has n’t been any issues that was not resolved. Having a professional team that is there to support you with your questions and helps you troubleshoot is priceless. Plus, there is a huge online collection of guides and video tutorials that their team has published that will be a good starting point for resolving your questions. Their knowledge base articles are detailed and highly useful and I have myself used them a lot.
3. Squarespace has a community behind it.
What do I mean by a community? There’s a community of web designers, web developers and bloggers who have put out tons of useful content on their blogs. They have created tons of video tutorials on YouTube and they have created workshops, programs and online courses. These are all packed in value and offer a huge resource at 4 am in the morning when an idea hits you and you want to run to your computer to implement it. This is important because it shows that Squarespace has already been tried and tested by thousands of users. And they are testament to the value Squarespace provides. See a directory of Squarespace Designers put together by my colleague Erin Neumann here: https://www.bealignedwebdesign.com/best-squarespace-web-designers
4. No coding, no design experience needed.
As I mentioned in point one, Squarespace is geared towards the non-designer. So you can create a highly professional website just by using their templates as a starting point. That means you do not need to know any HTML or CSS nor do you need a design-eye. Just switch out the template photos and content and you have a website that looks stunning and can get you started. This is the first barrier that is removed. Of course, you can do a lot to move away from the template and make it look more unique and fresh. But that can always be done in phase 2. It is so important to get started building your SEO (Search Engine Optimization) with your content and blogs. So my recommendation to you is just go and build your 5 most important pages and then you can tweak the design and make it all cool gradually.
5. It’s an all-in-one platform.
This is a really important point. Running an online business means there’s so much to think about and take care of. Then on top of that if you have a gazillion apps and third party integrations, then it just makes your business life very dense and complicated. And you didn’t get into business for more complication, I am guessing, but rather for optimizing your time, streamlining and powering up your life…to make an impact and grow your revenue, not to sort through hundred million different apps, right? That’s why Squarespace is really useful because you can do everything in one place: grow your email list, send out weekly newsletters, sell your services, sell your digital/physical products, demonstrate your expertise via a blog or podcast, host your online course, schedule free discovery calls with potential clients, sell paid consultations, run your website analytics, and so on and so forth. It’s all here in one place.
I run to websites on Squarespace, one you are on right now: sophiaojha.com for my web design business and the other for my site about mindfulness and meditation: reflectionpond.com which is the reason I got into online marketing and web design (I wanted to learn how to promote my meditation programs and that’s how I got into learning about web design…if you want to know more about that journey, see my Manifesto page).
Al’right, so what’s the next step?
Take it for a Test Drive.
Take it for a Test Drive. Just like you can take a car for a test drive, you can try out Squarespace for free. No credit card needed. Select your location below and start a free trial and play around with it. I will be posting more videos to show you how to create your first page on Squarespace so look out for that. Try it before you buy it!
14 Day Free Trial for US residents:
https://www.sophiaojha.com/squarespace-us
14 Day Free Trial of International Residents (Non-US):
https://www.sophiaojha.com/squarespace-world
Get Started on Your Dream!
Start your Squarespace website and let me know how it is coming along. Drop me a line in the comments and share with me what your business is and what you want to create.
Peace,
Sophia
080: How to Remove Background from Photos using Canva
In this video tutorial, I take just over 5 minutes to show you how to remove background from your photos using an app called Canva. Also get the complimentary link to try Canva Pro for 30 days!
First of all, I am so excited to restart my content creation for 2020! After the first two quarters of very busy client projects, I am back to creating new content for you.
In this video tutorial, I take just over 5 minutes to show you how to remove background from your photos using an app called Canva.
Show Me Your Work!
I love to see what you create. So drop in a link to your creation in the commetns below and let me see how you’ve used the instructions in this video,
Peace,
Sophia

079: The First Two Steps To Creating Leveraged Passive Income With Digital Products
Let’s begin with a pop-quiz!
Pop-Quiz: If you want to create a passive income stream with digital products, which of the following do you think would be your first two steps?
Pick from the following options…
Let’s begin with a pop-quiz!
Pop-Quiz: If you want to create a passive income stream with digital products, which of the following do you think would be your first two steps?
Drafting an outline of your online course
Deciding which format your digital product should take (audio, video, course, membership, etc)
Break writer’s block by just start writing your first chapter of your course
Review which online course platforms are the best for your business?List of equipment you need to buy for creating your digital product
Which third-party integrations will you need on your Squarespace website for selling your course?
Figure out how to price your digital product
Should you go on launch mode or evergreen it?
Yes, you will need do invest time and thought into these areas before you create your digital product. But none of these makes up the first two steps. Before you do any of the above steps, you first need to 1. find out what problems your own clients are asking you to solve for them and 2. find out if someone will pay for your digital product.
Step 1: Figure out what solutions my clients want
Step 2: Find out if someone will pay for your digital product
Let’s dive into each of these one by one.

Step 1: Find out what your clients want
You see, you have so much to teach and share that you could probably begin drafting an outline for an online course in a single afternoon, if you really wanted to. But what I found out from my year and half of online course making adventure several years ago is that, as much as you need to teach what you know, you also need to align it with what the market wants. I am not saying that the thing you want to make needs to be already have existed because with that logic the light bulb would never have been invented, nor would have the airplane. Or any of the millions of new innovations that continuously come into being. But they all came into being because there was a need for it, a yearning for it in some form or the other. The end result or the product that you create doesn’t necessarily need to be existing previously. But the problem that your product solves, now that, that does need to be existing previously.
The end result or the product that you create doesn’t necessarily need to be existing previously.
But the problem that your product solves needs to be existing previously.
So when it comes to creating your first online course, it is important that you know what problems exist. And more importantly, what problems your own paying clients are asking you to solve. That information is evident in the kind of things people are paying you for because a service provide you are closely aware of what you are getting hired for. This not only will help you for example to create a customized service package but it is very useful for another reason. And that’s this: if there are folks who are paying you for a custom solution, then there are surely multiple others who want that as well but cannot ask for a customized solution for it. That’s where you can create leverage with a leveraged product.
Example 1: For example, let’s take the example of a web designer, named Sophia (…see my head nodding). For every one person who hires me to custom design their website there are many others who are learning how to build their own site DIY (Do-It-Yourself) style. So if you are web designer, can you think of a solution that serves the DIY people and can instantly leverage your time and efforts? Perhaps, a 4-week mastermind to build their website or an online course that walks them through each part of the website building process. Now, you can serve a lot more people and you have leveraged your time and efforts while increasing the business’ bottomline.
Example 2: Take another example: a programmer, named Alex, who is hired to create high-end custom code for individuals. How about a portfolio of standard code products that are at a lower price point than the custom solution but can be used by more than one person. Instant leverage!
Example 3: Or think of a master hand lettering artist, named Shawna, who gets commissioned by big corporations to come in and create hand made unique art on large walls in their lobby. She can think of teaching other hand-lettering artists on how to get commissioned by big corporates. This could be a six month online coaching program that may even be a high-end offer but has instantly leveraged her time, while attracting very serious artists who want to take their art career to the next level. And it’s all digital with pre-recorded sessions interspersed with some live laser coaching.
Example 4: A piano teacher, named Robin, does live three-week group courses to teach beginners how to play the piano. They then move on to an intermediate course where they have established themselves further in their piano skills. Now she knows that she has students who love her teaching style and have already come to her for beginner and intermediate group courses. She knows they are hungry to get good at their craft with HER help. This is where the digital product leverage kicks in: she can create a VIP three-month deep immersion course to help build up their repertoire. This immersion course could be designed as an online course with three modules over three months. Each month they master one module, with a video per week that contains short weekly assignments to complete/practice. At the end of each month, they come together in a live zoom meeting to ask questions and to demonstrate how far they have come with their skills. And they repeat this for each module. At the end, they have three distinct pieces mastered, say one from Bach, one from Mozart and one from Beethoven. Or let’s say the whole three months is about Bach and then the can go to Mozart in yet another three month program and then Beethoven in another three month program. And now you have a 9 month immersion program! This could even evolve into high-end in-person retreat type offering eventually.
Now do you can see what I mean? We need to understand what we are already being paid to create and then extrapolate from there. Take whatever you are already doing for your current clients who are paying you big bucks to do it and then think of how you can translate that into a digital product that can be purchased by a lot more people, thus, leveraging your time (you make the thing once) and generate on-going revenue from it (launch it or do it evergreen).
Actionable Task 1: Take Inventory of Your Past Client Projects
So alright, you may ask, ”What is the actionable step from this?” Well, the actionable step is to answer this question: What are your clients paying you for?” Take inventory. Make a list of past client projects that you got hired for. Then see what they look like. Now you if you are a business coach, you may say, “all my clients hired me to help their business get to the next level.” If you are web designer, you may say, “all my clients hired me to design websites”, or if you are a piano teacher you may say, “my students hired me to get good at their technique”. Okay, that’s a nice response. Perhaps I should specify and articulate my question better:
Q: What common thread do you see in the projects you got hired for in the last six months?
Maybe your coaching sessions were all about figuring out a niche, or on how to create a service package to attract clients.
Maybe your piano students were all self-learned students who now wanted to develop their technique, or some wanted to master reading music or they are mostly high-school students wanting to prepare to get into advanced music school.
Maybe you designed a string of websites for non-profits, or authors and coaches, or yoga and wellness instructors.
Action Step: Make a list of past client projects that you got hired for. And see what common thread you see in the projects you got hired for in the last six months. Circle, highlight, or underline similar projects and you will get your answer.
What to do if you don’t have paying clients yet?
Now, if you are at the start of your entrepreneurial journey, the main goal then is to get clients and get paid for your services. Digital products can come but they may not take center stage right away because you still need to validate your business and see if there’s any traction. An avenue for research for those just starting out is to see what people are writing in the comments of your own blogs or of your colleagues, what are they asking you on your social media channels or on others channels in your niche, and you can even search what questions people are asking on forums like Quora or Reddit or Facebook groups. Are there people wanting to pay for your particular service offering at all? You need that to happen first, right?
The bills gotta get paid and in my experience, the fastest way to create revenue from an online business is to offer a customized one-to-one service for clients. Now, if you create physical products, that’s a whole different ballgame and I have no experience in that area, so I will leave that topic for another expert to talk about. But what I do know from my own experience as an online business owner who started offering services first, is that when I got my first $90 to setup a ConvertKit account back in 2016 for my very first client (majorly underpriced, but hey it was a start), that’s when my business was born. Getting the revenue doing services for individual clients then created the momentum for me where I could then begin to think of leveraging.
The fastest way to create revenue from an online business is to offer
a customized one-to-one service for clients.
Are you on a hamster wheel of serving clients?
As satisfying as working with clients can be, it also made me realize that I was still trading hours for dollars. Nothing wrong with that, at all. But as soon as I was finished working for a client, I was back in client acquisitions-mode which often felt like starting from scratch. And I’d wonder if this is the point in the journey of a business owner that the thought aries, “How long can I sustain this? What if I could leverage my time and create new ways to generate passive income?” It certainly was for me.
Even a $1000/per month of passive income can mean a huge boost for any business that is under six figures. And that’s when we start dreaming of digitizing. Is that how you feel? Well, my friend, I know exactly how you feel. So if you don’t yet have paying clients, roll up your sleeves and get that first client. If you already have clients but feel you are stuck in the never-ending cycle of serving clients then working on acquiring clients, then serving clients and back again on the hamster wheel, I’d say try to find an outlet of time, a window of time, during the day when you plan your exit from this exhausting cycle. Yes, it’s great that you are running your own business and doing what you love but you also built your business for time-freedom not just money-freedom, right? So be patient while you are in it, but start scheming your digital leveraged product adventure at any free moment you get. Serve one-to-one clients now but keep in mind the big picture of where you want to go with your business and consider how serving one-to-many digitally can be a viable route for your entrepreneurial journey. Alright, now let’s continue with step no. 2.
Step 2: Find out if someone will pay for your digital product
Okay, so back to the steps you need to take for your leveraged digital product creation. Let’s say, you have identified your most common projects you got hired for. For the sake of example, let’s look at the piano teacher, Robin, who offers individual piano trainings. Now she does the actionable task from step 1 (see above) and finds out that 70% of her students are high school seniors wanting to prepare their college application audition video to get into music school. She still has a good percentage of self-learned adults who always wanted to learn piano from a trained instructor and that’s a good bulk of her clients. But the 70% of college-wannabes is a good segment that she can start thinking about specifically.
Robin could start strategizing what type of a digital product she should create for the 70% of her students who want to prep an audition video that shows their piano skills for their college application. Her digital product could be a summer intensive that students join during the summer before they begin college applications. It could be made up of modules in which she helps them to pick out the music pieces that they would include in their audition video, guides them on practice habits and how to create a schedule of practice, guides them on the right recording equipment they need, and all the way to finally recording the application video and getting it ready to send out come September.
An alternate approach would be for her to first create a series of live online workshops for each module. With a live audience you can tune in (no pun intended) to what the piano students are asking. Then after the live session are over, she can get back to her desk, review the recordings and then create clean video modules. By the way, this is exactly how I created my Host Your Online Course program in 2019. This approach turned out to have so much less pressure for me because now I could create the content as I went instead of having all the videos pre-recorded. Watch this video where I explain how and why I decided to take this route.
Now at this stage where she has come up with an idea for an online workshop or course, it can be tempting for Robin to jump into actually creating the digital program. But this is exactly what she should avoid. The next step would be to write up a sales page that articulates all that her program would contain. Now for me, I go straight to the backend of my Squarespace website and start creating the sales page. For some others, it may be best to take a notebook or open up a word/pages file on their computer and start writing. The idea here is to get the details on to paper and then on to your website. This also gives you an idea of how you want to price it because you see all the components of the offer laid out in front of you. Then, send an email to your students either individually or if you have built an email list, send an email to the people on your email list with an early bird invitation. Again, the format could be an online course or a series of live workshops.
You’ll notice, that at this stage, you have not created a single module. You are simply pre-selling your course/workshop before you create a single slide, any other digital component of it. The only thing you will have created is the sales page with the offer expressed in detail.
This method is not new and I am not the first one to be using it. I discovered it through my own trials and errors of course-creation, where I jumped right into creating a massive course and then painfully found out that there were no-takers. Pre-selling is an easier and much faster and low-risk way to find out if there’s traction for your idea. Create the sales page with an early-bird pricing offer and send it to your audience. If no one purchases, you need to get back to finding out what you need to change. It doesn’t mean that your idea was not useful or good, may be your audience is not big enough or your sales page was not impactful or you may need to tweak some other aspect of understanding what your audience wants. Once you have real people putting out real money for your offer, that’s when you have real evidence that what you are offering is wanted by your audience and it goes beyond just an interest in your offering.
Pre-selling is an easier way to find out if there’s traction for your idea.
Create the sales page with an early-bird pricing offer and send it to your audience.
Actionable Task 2: Validate your idea by pre-selling
After you’ve taken inventory of the common thread of hired projects in the last six months, think of what is the main challenge that your clients have asked your help for. Now, you can brainstorm a way to leverage that solution so that you can serve many people by creating something once. This could be a series of live group workshops as I hinted in the earlier section. But it could also be an online course. What’s important though is to see if someone will pay for it. And the way to find out is to make the offer to your audience (current clients or folks on your email list). Now if it will be an online course, make sure to plan your time wisely and clearly say on your sales page when the course will be released. And remember things often take longer than we had planned, so add in a good buffer of extra time.
Action Step: Write out what your digital product will consist of and what it will achieve for your clients. Create a pre-sell sales pages and add it to your website with early-bird pricing. Invite your your students individually or send the invitation to your email list.
How to create a pre-sell sales page
I think when people hear the term, “sales page”, they get a bit uncomfortable. First, because the idea of selling can be uncomfortable, and second they may not know what to put on a sales page. Now I should perhaps write another blog all about how to write and design a sales page, but for starters, let’s not complicate it. The sales page that you write to test your new product needs to have at least the following six things:
1. Tell clearly what the program/digital product will do for them: the benefits
2. Outline the different modules and what it contains: the features (videos, pdfs, action plans, worksheets, audios)
3. Note any timelines if it’s a live workshop, example: The program starts on July 15th. Early-bird ends on July 1st, etc.
4. Clearly state what it costs $$ and how they can purchase: purchase button, or by application.
5. What some other students have said: testimonials (if it is a first launch, add testimonials of your other trainings, services or offerings).
6. An official bio and a nice smiling photo of yours.
You can always embellish this but start with the basics and then build upon it. I have myself fallen in this trap of perfection. This really is a mental vice, not exaggerating here. To fall in the trap of perfection is a game of the ego that only causes you hurdles on your path to progress, under the guise that it only wants to make sure you look good to others. Dare to look bad, look imperfect: that’s better than not have anything created at all. (Okay, I am finished giving a pep talk, but more than you, it’s mostly likely, me who needs to hear this right now).
To fall in the trap of perfection is a game of the ego that only causes you hurdles on your path to progress, under the guise that it, the ego, only wants to make sure you look good to others.
Vanity ≠ Progress
Your path to creating leveraged passive income starts now
So I’ve outlined for you a possible path that you can take for creating your leveraged passive income. It’s now time for you to take action on it. It begins with first figuring out what kind of solutions your clients want, finding the common thread in the type of projects you were hired for, then translating that into a solution that will serve many in a leveraged way, and finally creating a sales page and inviting your potential and current clients to benefit from it.
Let me know in the comments what questions come up for you when you read this post and also share with me where in the passive income journey you are in right now.
Peace,
Sophia

Related:
073: Sell your course before creating it:
www.sophiaojha.com/blog/073-sell-your-course-before-creating-it
067: Three things you should know about doing a live workshop series
www.sophiaojha.com/blog/067-three-things-about-live-workshops
053: How to build a landing page on Squarespace for a "survey"
www.sophiaojha.com/blog/053-landing-page-on-squarespace
052: Do this One thing to get to know the real needs of your audience
www.sophiaojha.com/blog/052-ask-the-audience
031: How to Create an Evergreen Sales Funnel Using Visual Automation in ConvertKit
www.sophiaojha.com/blog/031-how-to-create-an-evergreen-sales-funnel-using-visual-automation-in-convertkit
Jan 1st 2020 - Close Out the Old. Welcome The New. Guided Meditation
Watch a recording of the Jan 1st live meditation.
Happy New Year! Join me in starting the year fresh with a guided meditation:
Much peace,
Sophia
078: How to add anchor links within blog posts
If you have a long-from blog posts that cover a lot of content, then consider using anchor links to break up the flow of the content. Anchor links in blog posts allow you to have a list of quick links at the start of the article so the reader can jump to the relevant section instead of having to scroll.
If you have a long-from blog posts that cover a lot of content, then consider using anchor links to break up the flow of the content. Anchor links in blog posts allow you to have a list of quick links at the start of the article so the reader can jump to the relevant section instead of having to scroll. I have done this in Blog Post #070 and you can click the link below to see the use of anchor links live in action:
https://www.sophiaojha.com/blog/070-3-easy-ways-to-edit-your-blog
In this quick video, I show you exactly how to set up the anchor links so that you improve the user-experience of your long-form blog posts. Check it out!
Related:
Want to know how to add anchor links on a page on your site instead? Go here:
https://www.sophiaojha.com/blog/077-anchor-links
Watch the video below:
Let me know what you think in the comments and drop in a link to how you have used anchor links! I’d love to see!
077: How to present a collection of pages using anchor links
Anchor links are a great way to showcase a collection of pages. Use it for your Services page, 3 Best Blogs, or a collection of your best Resources.
Anchor links are a great way to showcase a collection of pages. Use it for your services page, 3 best blogs, or a collection of your best resources. I show you how to create them in this video tutorial. Here I am presenting three workshops and you can see how anchor links help the visitor to jump to the relevant section on the page.
—
My biggest lesson ⎯ Use anchor links to create new page layouts
In summary: Use anchor links whenever you want to present a collection of content in an easy to navigate format for your website visitor.
Your Turn:
Show me your page layouts in which you’ve used anchor links. Let’s inspire each other with new page designs. Chime in! I’d love to hear from you!
~ Sophia

076: Squarespace SEO: 22 actionable things you can do (Part three)
I call this a Beginner’s Guide because these really are the first steps to get your site set-up for SEO. There’s always tons you can do but if you do these 22 things, you will be off to a great start. Some are to one-off steps, while others can become part of your SEO checklist for whenever you upload a blog or add a new page to your site.
Beginner’s Guide to Squarespace SEO (PART THREE)
Getting your website found on Google search results is one of the biggest goals of website owners. Whether your site is built on Wordpress, Shopify or Squarespace, good SEO (search engine optimization) strategies are key to your site showing up on the first page of Google for keywords specific to your business.
There is a checklist of SEO tasks that I teach my website design clients that they must go through every time they update their blog or add new pages to their website. Here are 22 of them. Why 22? Well, I was born on the 22nd but that’s not why we have 22 steps. It just happens to be 22 items for this Beginner’s Guide.
Go here for Part One (1-8)
Go here for Part Two (9-16)
You are reading Part Three (17-22)
22 SEO Tips for Optimizing Your Squarespace Website
I call this a Beginner’s Guide because these really are the first steps to get your site set-up for SEO. There’s always tons you can do but if you do these 22 things, you will be off to a great start. Some are to one-off steps, while others can become part of your SEO checklist for whenever you upload a blog or add a new page to your site.
Optimize Your Pages
18. Name Your Pages
When you create a new page in Squarespace, it automatically gets the name “New-Page”. Make it a habit to immediately name your new page according to its content. So call it “About” or “Work with me” instead of leaving it at the auto-generated name title. This is important not only for you, to know what your pages are, but also for SEO as your pages make more sense and can drive traffic according to what they are searching.
19. Have Unique Page Descriptions
Having the same page descriptions across all of your pages is not going to help you. Craft bespoke descriptions for each page adding relevant keyword descriptors without overly repeating them. You can click on the wheel icon next to each page and click over to SEO where you can now add descriptions and see how they will appear in search results.
20. Have a custom 404 Error Page
There are always broken links on websites - that’s the natural wear and tear of running a website - what is known as “link rotting”. You can fix those broken links periodically, and I have created a separate video showing you how to find and fix broken links. But when someone does click a link that is broken, a 404 Error page will show up. Make sure that you create a customized 404 Error Page that keeps the conversation going further instead of the user-experience being a dead end. I will make a video on this for you to be released on Sept 26th that will show you just how to do this.
Do this periodically
21. Remove Broken Links
As I mentioned in point # 20, cleaning up your site periodically to make sure there aren’t broken links is a good practice. Think of it your website Spring Cleaning that you really can do anytime of the year. Here’s the video showing you some free tools to do this easily.
22. Get many many backlinks from authority websites
Backlinks are still important for Google Search results. But the quality of backlinks is even more important than the quantity. If your site is linked with high authority websites that are reliable and trustworthy, then that’s a good quality backlink. Showing up in podcasts or writing guest posts or being interviewed on an authority site are some good ways to get quality backlinks.
23. Learn about new SEO requirements
Things are constantly changing and the tech world is no different. Make it your goal to keep an open mind and learn about new SEO requirements as new developments in technology take effect. One way to do that is to go to experts who make it their mission to bring these new changes to you and keep you up-to-date as a result.

My biggest lesson ⎯ Create a website with the end-user & user-experience in mind
In summary: It’s interesting, you’ll find that whenever you do something on your site to optimize SEO/Search Engine results, the same actions are also helping your visitor in some way. So you can see the direct correlation of making your site really work for your site visitor and your site getting found higher in search results. Make that your focus and you will naturally help your site get new and regular traffic.
Your Turn:
What do you think of the message in this blog article? Do you have a course created or are you planning on one? If so, let me know in the comments what your course is all about/will be about. Chime in! I’d love to hear from you!
~ Sophia
075: Squarespace SEO: 22 actionable things you can do (Part TWO)
There is so much you can do to help your website appear in search engine results. I covered the first eight steps in part one of this blog + video. Here’s the next installment. Go ahead and put this into place in your own SEO strategy for your business.
Beginner’s Guide to Squarespace SEO (PART TWO)
There is so much you can do to help your website appear in search engine results. I covered the first eight steps in part one of this blog + video. Here’s the next installment. Go ahead and put this into place in your own SEO strategy for your business.
Here are all the parts:
1. Go here for Squarespace SEO - Part One (Steps 1-8)
2. You are reading Part Two (Steps 9-16)
3. Go here for Squarespace SEO - Part Three (Steps 17-22 coming next week)
—
22 SEO Tips to get found in Google Search Results
SEO is an approach that is more than just a checklist. But a checklist is a good start. We can go deeper into SEO as a strategy and as a mindset approach after the basics are put into place.
Steps 1-8 are found in the previous blog post.
Ramp up your blogging action
9. Publish useful content
This is part of the long-term approach to SEO. When you create useful content, people will find your website and your business becomes highly valuable to your audience
10. Write long-from blog posts of 2000 words or more
Research says that long-form articles tend to be ranked higher because they are more likely to dive deep into a topic rendering that post very useful to the reader.
11. Publish consistently
Aim to publish at least weekly, if you can. Otherwise whatever schedule you choose, try and stick with it for a couple of years. (Yes, a couple of years, at least!).
12. Use shorter URLS
Somehow a url that says sophiaojha.com/seo is perceived better for rankings than: sophiaojha.com/the-article-about-squarespace-that-every-one-should-read
13. Have shorter anchor links
When you link text in the body of your pages or blogs link only a short bit of text. So for example, Squarespace Fundamentals is better than learn about my beginner live workshop called Squarespace Fundamentals.
14. Include links to other content on your site inside your blogs
This helps Google read your site better. So link to different pages on your own site as much as you can (and as much as makes sense).
15. Use only one H1 title
You can use multiple H2 headers but only one for H1.
16. Use multiple heading tags (H2 and H3 Tags)
Break up text using H2, and H3 headers.
Some research that supports point 16:
1. ”Multiple heading sizes used in order create a hierarchical structure for your content, making it easier for users to navigate through your document” - https://support.google.com/webmasters/answer/7451184?utm_source=wmx_blog&utm_medium=referral&utm_campaign=tls_en_post&visit_id=637013956090808420-4146294996&rd=2
2. https://backlinko.com/search-engine-ranking
Now on to Part Three >> for steps 17-22.
My biggest lesson ⎯ Follow a SEO checklist for each blog post.
In summary: There is a lot you can do to boost your SEO when you set up your blogs. Follow the above steps each time you write a new blog and that will help you content be found better.
Your Turn:
What SEO tips were new to you and which ones have you already put into place! If so, let me know in the comments what your course is all about/will be about. Chime in! I’d love to hear from you!
~ Sophia

074: Squarespace SEO: 22 actionable things you can do (Part One)
Getting your website found on Google search results is one of the biggest goals of website owners. Whether your site is built on Wordpress, Shopify or Squarespace, good SEO (search engine optimization) strategies are key to your site showing up on the first page of Google for keywords specific to your business. Here is part one of my Beginner’s Guide to Squaresapce SEO. Read more…
Beginner’s Guide to Squarespace SEO (PART ONE)
Getting your website found on Google search results is one of the biggest goals of website owners. Whether your site is built on Wordpress, Shopify or Squarespace, good SEO (search engine optimization) strategies are key to your site showing up on the first page of Google for keywords specific to your business.
Getting your site optimized for SEO is more than about a list of steps. It’s about your mindset and your overall approach to it. But there are some items that you can check off from a list. And here are 22 SEO steps you can do to get your site better prepared to be found in search results.
(There is a checklist of SEO tasks that I teach my website design clients that they must go through every time they update their blog or add new pages to their website. Here are 22 of them. Why 22? Well, I was born on the 22nd but that’s not why we have 22 steps. It just happens to be 22 items for this Beginner’s Guide.)
This is Part One (Steps1-8)
Go here for Part Two (Steps 9-16)
Go here for Part Three (Steps 17-22)
Watch Video Below:
—
22 SEO Tips for Optimizing Your Squarespace Website
I call this a Beginner’s Guide because these really are the first steps to get your site set-up for SEO. There’s always tons you can do but if you do these 22 things, you will be off to a great start. Some are to one-off steps, while others can become part of your SEO checklist for whenever you upload a blog or add a new page to your site.
Do this once:
This first batch of steps you need to do just once. You just set it and forget it.
1. Add your site to Google MyBusiness
This is one of the things you can quickly set up so that your website is found when people do a local search. You can set it up for free here: https://www.google.com/business You can come back to it and make fill it up with more detailed info but at least have a presence set up first.
2. Make sure your site is Mobile Friendly or Mobile Optimized
This should not be a problem if your site is on Squarespace as your website is mobile optimized right off the bat. You can drop your url here and see if your site is mobile friendly: https://search.google.com/test/mobile-friendly
Go ahead and make sure the AMP (Accelerated Mobile Pages) is activated. Go to Settings > Blogging > check Use AMP
3. Submit your site to Google Search Console
This is useful for many reasons. One of them being you get data about what keywords people are using to land on your site. If you have a Squarespace website, you are in luck because now connecting your site to Google Search Console is easy as a few steps. You go to Settings > Connected Accounts > Click Connect Account button > then click on Search Console.
Here’s an article from Squarespace that helps you do just that:
https://support.squarespace.com/hc/en-us/articles/360001014647-Google-Search-Keywords-Analytics
And here’s one more specifically about Search Console:
https://support.squarespace.com/hc/en-us/articles/205813918-Verifying-your-site-with-Google-Search-Console
4. Activate “HTTPS”
When this new requirement was issued, I remember a lot of our Wordpress colleagues pulling their hair out. Switching to HTTPS shows Google that your site is secure and they even reward that when it comes to ranking your page. This is an exact quote from the Google people:
“…we're starting to use HTTPS as a ranking signal.” - https://webmasters.googleblog.com/2014/08/https-as-ranking-signal.html
Again, if your site is a Squarespace website, this is all about a few clicks. Just go to Settings > Advanced > SSL > then check Secured and HSTS secure.
Optimize Your Images:
5. Include at least one image in each of your blog posts
According to a study done by the people at BackLinko, adding at least one image to your blog posts increases its ranking. Source: https://backlinko.com/search-engine-ranking
6. Name your images before uploading them
Name your images (for example on your desktop) before uploading them with relevant keywords before uploading to Squarespace. Instead of the file saying IMG007, name it to “SEOtips” or something like that, that’s relevant to your business. This again adds more information for Google Crawlers.
7. Make sure the image size is 500KB or less
This just helps your site to load quickly. The quicker your site loads the better it is for SEO. Plus, you will retain more visitors on your site The more information-overload our society gets, the lower the attention spans, it seems.
8. Use Alt-text behind every image to add more keyword juice
Because Google crawlers cannot read images the way they can text, you must use alt-text behind every image. This gives Google more information about the content on your pages. Do that by adding a text after uploading an image in the section where it says “optional”.
More steps coming in next week’s blog
Now on to Part Two >> for steps 9-16.

My biggest lesson ⎯ Adopt a value-giving mindset to boost your SEO results.
In summary: Taking a long-term approach to SEO will take you far. Install these steps, but think, “How can I turn my website into a valuable resource for my audience and prospective clients/customers”.
Your Turn:
What do you think of the message in this blog article? Which of the SEO steps you’ve already put into place and which ones were new? Let me know in the comments as I’d love to hear from you!
~ Sophia
073: Sell Your Course Before You Create It
Let’s say you are a service professional. You are trading your time for money. You are serving your clients one on one. Now you are thinking how can I leverage your time?
Well, one way to do it is to package your services into an online course. But creating an online course involves a lot of time investment and money and know-how on how to set things up. Read more…
If you are a service provider and serving clients one on one but want to leverage your time, this blog + video is for you.
—-
Package Your Services as An Online Course
Let’s say you are a service professional. You are trading your time for money. You are serving your clients one on one. Now you are thinking how can I leverage my time?
Well, one way to do it is to package your services into an online course. But creating an online course involves a lot of time investment and money and know-how on how to set things up.
Plus, you have to research your idea and really know whether there is an interest. Before you go out and spend your time and money, researching your topic, creating your course, and setting it all up, I have one tip for you to consider:
Tip No. 1: Consider selling your course before building your course.
Now this may come as a new idea or you may have heard it before. In either case, I want to share with you my personal experience in my course creation journey so that you learn from it and avoid the mistakes that I made in the process.
About two years ago, I created my first online course. It was for my personal development site called Reflection Pond and the online course was called, “Happiness Gameplan”.
I invested a lot of time in research, I re-scripted my video at least four times before I went out and shot a single video and I bought a highly expensive camera to record all my videos, all on credit card because I was banking on the idea that I will make up the money when I sell my courses. It was to be my best work ever. It was a 45-video, six-module extravaganza that I spent a year and a half building. This included all the time I needed to research, write the script, shoot the video, edit the video, set it all up, researching different platforms to host the course and then, finally I launched it.
Sadly, I launched it to crickets. Not a single sale.
Market Validation is Key to Your Success
The step that I had missed was to actually find out if somebody was interested in that topic at all and whether that somebody was in my audience. I had already spent time building my list and my audience but I had not figured out whether or not my audience wanted to hear from me. It was a message I wanted to share so I went out and made my course.
This is not a smart way to go about it. You must first see whether or not there is interest in your topic.
So when it came time to build an online course for my current business, my web design business, I took plenty of time to figure out whether I wanted to invest my time and money in creating it and whether there was an interest in it. And in doing so, I avoided the number one mistake that most online course creators make and that is to build a signature course, a large course, and investing a lot of time and money without finding out whether there is a market for it, whether there is traction for your topic.
What are Your Clients Asking You to Solve For Them?
The way I went about creating my course, really came from my clients. I had a client who was doing live workshop. And after the live workshop was completed, he wanted a place to host it on his Squarespace site. So he hired me to build his online course home, and automate the delivery of the course once somebody purchases the course. This was a real life client who needed a real solution to his problem and that was to host his online course on his Squarespace website. After he hired me an idea popped into my mind. What if there were other people out there who also wanted to host their course on their Squarespace website. This actual project gave me the idea of creating an online course.
However, I was not ready to spend more time building it without knowing whether there is really an interest for it. So instead of creating an online course, what I did was, I created an online workshop. As a Squarespace Authorized Trainer, I had already been doing online workshops for about a year, so this came very easy to me and it was an easy next step to build. I pitched it to my audience and it turned out that they were interested in it. After there were sales for my online workshops only then I was ready to build my online course. When I had the online workshop, I carved it out as a three-part live session. So I would prepare the content in the weeks between and then go live and present my powerpoint presentation and hold my live workshop on the topic.
And in doing so I realized that there was a lot of nitty gritty details involved in hosting a course on Squarespace. I was able to really dive deep in every step needed in setting it all up. After the online workshop was over, I decided to then take the next step and turn it into an online course. So the next thing I did, I pitched my online course to my audience. I presented the value of hosting their course on Squarespace and then invited them to join the online course.
Once there were sales, actual students who wanted to be part of my course, only then did I go and build that online course.
Now this can be very nerve-racking for many course creators because once you have students then you are supposed to go and build in a very limited amount of time. For some people this may work because it gives you a real deadline because you have to publish content by a certain date because there are actual students waiting for that content. On the other hand, it may be very stressful.
Create Your First $200 Mini-Course
The way to solve that is to create a mini-course, a small course, instead of creating a large, signature product. At least that is my experience and that is my suggestion that for your very first course it should be a small, let’s say, a $200-$300 mini-course. In my case, it happens to be a three-module course with multiple videos, but all the content can be consumed in two and a half hours. So somebody can sign up to the course on a Friday, binge-watch all the videos on Saturday and host their course on their Squarespace website on Sunday. So that’s what I did. I created a small mini-online course and that was much more feasible for me.
Of course, that month when I had to deliver the videos it was crunch time all the time and of course, it was a very intense and a lot of pressure to deliver on time and create a good product at the same time. So it can be very time consuming and intense but it is for a short amount of time and you already know that there is an interest.
So in that way, I avoided the second mistake that online course creators make and that is to create a big course as their first course.
Tip #2 is to create a mini-course $200-$300 that you can produce within a month.
So those are my two tips for you if you are considering online course creation as a way to leverage your time to create revenue avenues from your website: Create a mini-course and then host it on your Squarespace website.
If you’d like to know more about this online course that I referred to, it’s called Host Your Online Course. It is a three-part online course instantly available when you sign up. You can learn more at sophiaojha.com/hyc. To help you create your first online course, I’ve created a step-by-step guide that you can download for free. Just go to sophiaojha.com/guide.
Thank you!
My biggest lesson ⎯ Sell Your Course Before Creating It
In summary: Before you invest countless hours and dollars into creating your online course, my tip is that you get some commitment from you audience before venturing out to create it.
Your Turn:
What do you think of the message in this blog article? Do you have a course created or are you planning on one? If so, let me know in the comments what your course is all about/will be about. Chime in! I’d love to hear from you!
~ Sophia

072: 12 Creative Uses of Squarespace’s Cover Pages
Owning a Squarespace Website comes with many perks. One of them is Cover Pages. These are pre-designed layouts already within your website that are easy to set up.
Use Cover Pages for a variety of purposes: announcing the launch of a new book, new product or service, as Thank you Pages, for building your email list or as a landing page for people to sign up to your online or in-person event.
Watch this video to see 12 creative uses of Cover Pages:

Your Turn:
Have you used Cover Pages on your site? If so, post a link to your cover page example. Chime in, in the comments below. I’d love to hear from you!
~ Sophia
Update: It’s October 2023 and I am revisiting some of my old posts and Cover pages are no longer a feature on the latest Squarespace version. However, one can recreate the layout and design of Cover pages using some code to hide the header and footer, essentially creating a “Cover” page look as a result.
071: How to Remove Date From Blog - All Brine Family Templates
There is so much one can do with their Squarespace websites without even going into extra code. This blog and video was inspired by a comment on my YouTube Video for Blog 026 which was about removing the date from blogs in the Hayden and Pacific templates. Here I show you how to do so for all templates in the Brine Family.
There is so much one can do with their Squarespace websites without even going into extra code. This blog and video was inspired by a comment on my YouTube Video for Blog 026 which was about removing the date from blogs in the Hayden and Pacific templates.
How to remove date from blogs in the Brine family templates without code
The short answer is: Go into your Design panel> then Site Styles. Look for all the settings related to Blog. Then under Blog: MetaData, select the primary and secondary options to “None”.
There you go. No code needed. No CSS headache. Of course, this is relevant only for the Brine Family of templates. If you have Hayden or Pacific templates, check out my Blog 026 which shows you what CSS code you need to use and where to paste it.
Is my template in the Brine family of templates?
I will often refer to Brine Family of templates in my videos and blogs. If you want to know whether your template belongs to Brine, look at the chart here and then keep that in mind whenever you are researching for answers. Many bloggers will refer to Brine Family of templates in general so then you will have more answers when searching something on Google or on my blog archive here.
In essence, Brine family of templates is a group of templates that belong together. So anything you can do in one of them, you can do in all of them. This is the template family most favored by my colleagues and web designers in general, because it offers the most optimization possibilities without having to use code. The one big drawback is that it doesn’t allow for a blog sidebar. As you will see on my blog, there is no sidebar as I am using the Rally template (within Brine Family). I am fine with it because it gives my users complete focus on the topic at hand.

You cannot have all the nitty-gritty options that one would otherwise have in the sidebar. My workaround is, I post those things at the bottom of my blogs and then on the main blog page itself, I offer multiple ways to search for content. This works fine for me and I am trusting my website visitors appreciate it too. Helping your readers to focus is quite a nice thing. Focus is good!
Explore in-built options before going for code
In summary: Whenever you want to make a change on your website or are looking for a way to accomplish something visually, your first course of action should be to go into your Design settings and see what possibilities already exist. Squarespace continuously tries to make their web platform as user friendly as possible for DIY’ers (Do-It-Yourself Folks), so they may have already included a way to accomplish exactly what you want within their interface without the need for code. So give that a try before hunting for code.
I hope that this helps you not only to remove the date from your Brine Family template but learn a common practice to adopt in your workflow - see what in-built features already exist inside Squarespace before looking for more complex solutions. Simplicity Rocks!
Your Turn:
What kind of changes are you wanting to make to your website? Chime in, in the comments below. I’d love to hear from you!
~ Sophia

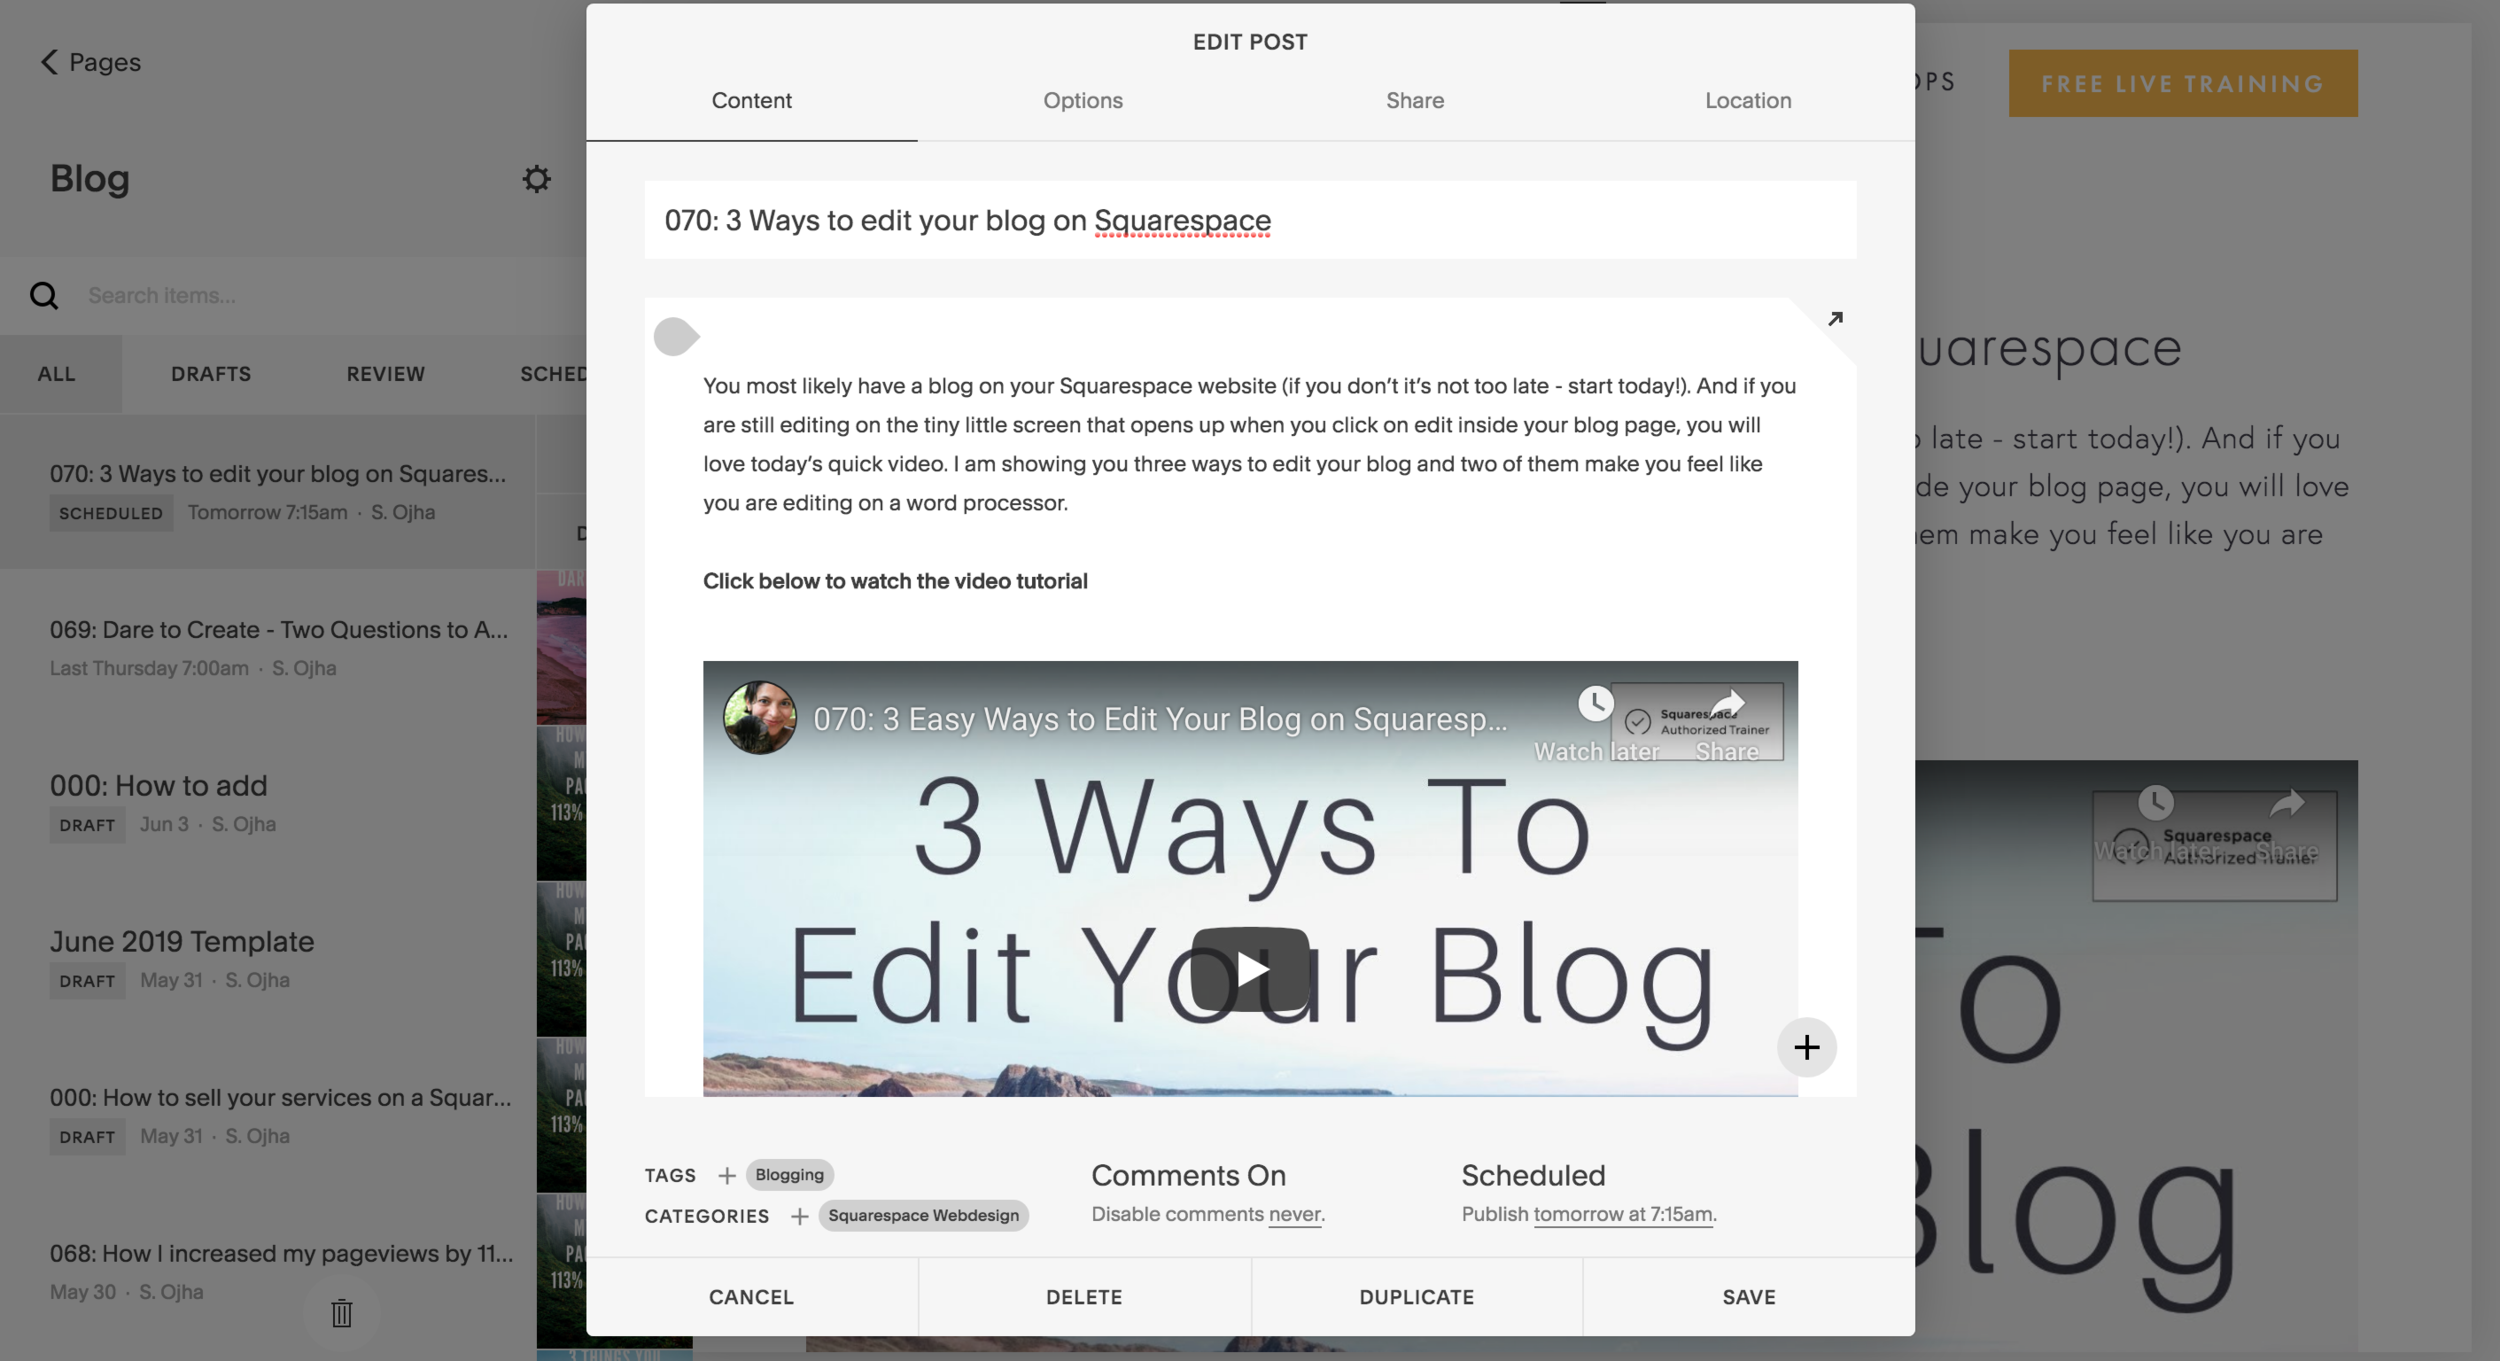
070: 3 Ways to edit your blog on Squarespace
You most likely have a blog on your Squarespace website (if you don’t it’s not too late - start today!). And if you are still editing on the tiny little screen that opens up when you click on edit inside your blog page, you will love today’s quick video. I am showing you three ways to edit your blog and two of them make you feel like you are editing on a word processor.
You most likely have a blog on your Squarespace website (if you don’t it’s not too late - start today!). And if you are still editing on the tiny little screen that opens up when you click on edit inside your blog page, you will love today’s quick video. I am showing you three ways to edit your blog and two of them make you feel like you are editing on a word processor.
Click below to watch the video tutorial
Updating your blog should be quick, easy and fun. If you are used to writing on your word processor in a full-screen mode to remove all distractions, you will love Update Method No. 3.
Update Method No. 1
The first method is to click on “Edit” when you open up your Blog just like the purple arrow is showing you in the image on the right.

It will open up to this box below. It is a tiny frame within which you are now to unleash your creative powers.
Alas, a small tiny box tends to narrow our vision and I personally find it limiting when it comes to writing my blog articles. So I go on to Update Method No. 2.
Update Method No. 2
In this method, instead of clicking the “Edit” in the left sidebar, you are to click “Edit” that shows up in within the small black box above the blog article itself, just like the purple arrow is pointing to in the screenshot below:

It will open up a bigger box like this:

Now that’s much better. But how about this third method that allows you even more screen freedom? Check out Update Method No. 3.
Update Method No. 3
To arrive at the large screen that I’ve been promising so far, you’ll need to first click on Edit in the sidebar (just like in Update Method No. 1). See the purple arrow below:

Then, it will open the tiny box. You need to now click on the arrow on the upper right corner of the tiny box like you see in the image below.

That will open up the page to a full screen mode where you have the wide open canvas to paint with your words, images, video or a combination thereof. This mode allows for the most flexibility and ease when updating your blog post.


It may look like a small detail but when you want to crunch out lots of quality blogs and articles for your content marketing, then having conducive methods will go a long way.
I hope that this video and blog makes editing your blog fun. When you are having fun, you will be more creative and create more and better things for your audience!
Your Turn:
Tell us what you blog about and here’s my invitation to drop in the URL to your website in the comments! Hey, take this up because - free advertising :-) Chime in, in the comments below. I’d love to hear from you!
~ Sophia
069: Dare to Create - Two Questions to Ask Yourself Before You Create New Content
Creating content consistently is important but the road is filled with challenges. I share a few thoughts from my two years of building my business and creating content and the two questions that guide me when I create a new video or blog.
My biggest lesson was "Show up consistently." For the full story, click to see the rest of my blog + video.
Today, I just wanted to share some thoughts that have been lingering in my mind about online business. And I hope that what I am sharing with you today will help you in your own journey as a self-employed business owner or a freelancer.
Click below to watch video:
I have been running my business since 2016 and it has taken quite a number of twists and turns. I’ve even closed down my business in the middle of this duration because I was burnt out and overworked. I have made some changes over the years and one of the things I have learnt that is so important for growing my business and growing myself as an individual, as a business owner is to keep showing up - to keep PERSISTENTLY showing up. I say that with a lot of love and lot of understanding because I know it is not an easy journey, especially, if you are doing a 9-5 gig and working on your side hustle which is your online business. It is not easy. And on top of that if you have family and community commitments. We fill our lives with so many things to do, sometimes out of choice, sometimes out of the fear of missing out and sometimes that’s just the responsibilities and obligations that our lives contain. What I want to say with that is that I do understand that it is not easy to keep showing up. In fact, it is a road filled with challenges. If you can keep the goal, why you are doing the things you are doing in your business - may be you want to pay off your mortgage, or you want some extra cash to pay off your debt, may be you want to build your retirement savings. Perhaps you want to be free from a 9 to 5 commitment and travel the world. Or even stay wherever you are but not have to commute to work - just roll out of bed and start working or a combination of all of these. Whatever your goals are, identify them and keep them in mind. And then find a way to commit to showing up.
One of the areas where we need to show up is in content creation. This is quite a controversial topic because a lot of people out there including digital marketers will advise you to do ads and speed up the process of building your site/business. And I am not against that at all. But I do believe that you need to create content that shows your authority, your expertise, and your skills. You need to create content even if you believe that you are not yet a master of the topic you are teaching. No matter what you are teaching, if you know how to do it, there will always be somebody else who is still learning. You are always a few steps ahead of someone who is trying to learn something that you’ve already accomplished. So, just show up and lend a hand to the other person who is right behind you, even if you are just a few steps ahead you can reach back and lend your hand. Apply that in the topic of your expertise of what you want to share and teach.
One of the ways we fail to show up is because of fear. The fear can be of so many colors and so many variations. It could be the fear of showing up on camera because you are concerned about how you are going to look and how you are going to be perceived by your audience. You may not like how you like. You may not like how you sound. You may not be confident in your public speaking skills. You may be overly critical of yourself. That is all part of being human. You will learn just by doing that you start to love and appreciate yourself more.
My first video I made about eight years ago was pathetic! I look back and see that there was no creativity. It was my first attempt at making a video for YouTube. But I appreciate myself for doing that, for taking that first step, no matter how I novice I was at the time. It has helped me to grow. It has helped me to take my first step and start a long journey which I’ve now come far ahead now from where I started. Each time I made a new video, I appreciated myself more, I appreciated myself for making the effort and for daring to create, daring to speak, daring to show up and daring to present myself to the world. It’s not an easy process as you may understand, as you may recognize yourself. At some point, you may have felt that too. It’s challenging to pick up your pen and write something or to type something on the computer and put yourself out there. But it is absolutely important. And I’ll tell you why.
Why is creating content important?
The first reason is, as you create content whether it is an article or a video, you are going to learn what you already know. You are going to feel more confident in yourself. You will have a portfolio of content created over time. It builds up so quickly, one article at a time, one video at a time, one podcast at a time. You will see that you’ve created a body of work that you will look back and feel proud of, feel content with, feel a sense of fulfillment. No amount of money is going to give you that fulfillment that a sense of looking at your work and seeing how you have progressed, how you’ve become better, how you have helped other people, will give you. That gives me a great sense of fulfillment.
Another reason you need to build your content portfolio is for that potential client, that potential customer out there who is looking for your services, who is looking for a course you’ve created. But they’ve just run into you. They have just found you on the web - just scrolling. Google show your site and now they are on your site. They are very close to hiring you, or very close to purchasing from you or even subscribing to your newsletter. But they want to know who you are. They want to know do you know what you are talking about. Do you have the skills, the expertise, the knowledge? Are you the person that’s going to help them move from point A to point B. And for that your portfolio of content will be testament to your skills and expertise. They will read a few of your blogs, they will watch a few of your videos. They will get a gut instinct, a feeling in their stomach or in their heart, a sixth sense that says, “Yes, you are the right person and I am gonna go with you”.
This happens over time, of course. It will not happen with one or two blogs and videos.. You need to persistently show up and create that content. It’s not easy. It’s not easy at all to constantly come up with ideas. But if you can think from the point of view of the person you are creating this content for. Just think of one person - a friend or a colleague. It could be somebody you think could benefit from what you are creating. Just think, what is the problem that I can solve for them. What do I know that I can share that can help another. I have these two questions on my board, every single day. It always stays there. It says, “Who can I help today? and How can I help someone today?”.
If you can think about these two questions, ideas will start flowing. You will be inspired and you will start writing an article. You will start creating a video. Sometimes the content that you create will be a help to your own future self. For me, two weeks, two months or two years down the road, I will look back and I will be inspired by the words I say today. Because there will be moments when I am confused, when I am not sure of myself or doubt my work or wondering what should I talk about. I will look at this video and I will be reminded taht I only need to think about: Who can I help today and How can I help someone today? That’s it.
No need to worry about whether my subscriber is brand new to the topic or they are advanced and whether I am going to lose them because I talk about a topic that do not connect with. Don’t worry about it. I say that because I myself have faced these kind of thoughts. My list, the people on my email list are a variety of creatives, a variety of entrepreneurs, some of whome are brand new while some have made more progress and some are pretty advanced. Different content I create speaks to different people on my list. Sometimes I run into this question myself: If I create this video on this topic, am I going to alienate the beginners or am I going to push away the advanced people? And what happens is that I become paralyzed and I don’t create anythin at all for a while because I am figuring out how to please everyone and how to serve everyone. In fact, that’s just serving no one. When I am not creating content I am not helping the beginners, nor those in the middle nor those more advanced because there is no content to look at. This kind of thinking is just a form of doubt, a form of sabotage that comes on your journey as you build your online business. This is just one example. There are different kinds of questions and doubts that will appear and create a roadblock on your progress. So what is important is to recognize them and to move through them. Keep going, keep showing up and stay close to your purpose, your why, the reason why you have set up this whole online business in the first place.
Once you stay current with that, stay familiar with that why, that purpose, then ideas start flowing and you are filled with more energy and motivation to do the job you said you wanted to do. So I want to encourage you to continuously create content, to show up and help the people that are coming to your website or your blog. Help them with something that you know that can be of assistance to them, that can take them forward on their journey.
With that, I wish you all the best. Thank you so much for watching, come back to my blog again and subscribe to my newsletter to keep up-to-date, if you like. Over all, dare to create - that’s going to take you a long, long way.

My biggest lesson ⎯ Keep Showing Up Consistently
In summary: Creating content is not easy but vital for many reasons. Keep showing up consistently and you will grow your business by serving your audience.
Your Turn:
What do you think of the message in this blog article? What kind of mind set challenges have you faced or overcome. What kind of content do you create - blog, video, podcast or a combo. Chime in, in the comments below. I’d love to hear from you!
~ Sophia
068: How I increased my pageviews by 113% in 5 months
Creating content for your readers is an important part of growing your business and website traffic. That's something I learned first hand this year after analyzing my website stats (statistics).
In this blog, I share with you the exact numbers from my Analytics panel (yes, screenshots are included) and the exact steps that I took to achieve a 113% increase in pageviews when comparing the first five months of 2018 and 2019.
My biggest lesson was "Publish useful content weekly" and "Look at your own path of progress." For the full story, see the rest of my blog:
Content creation is a vital marketing tool for your business
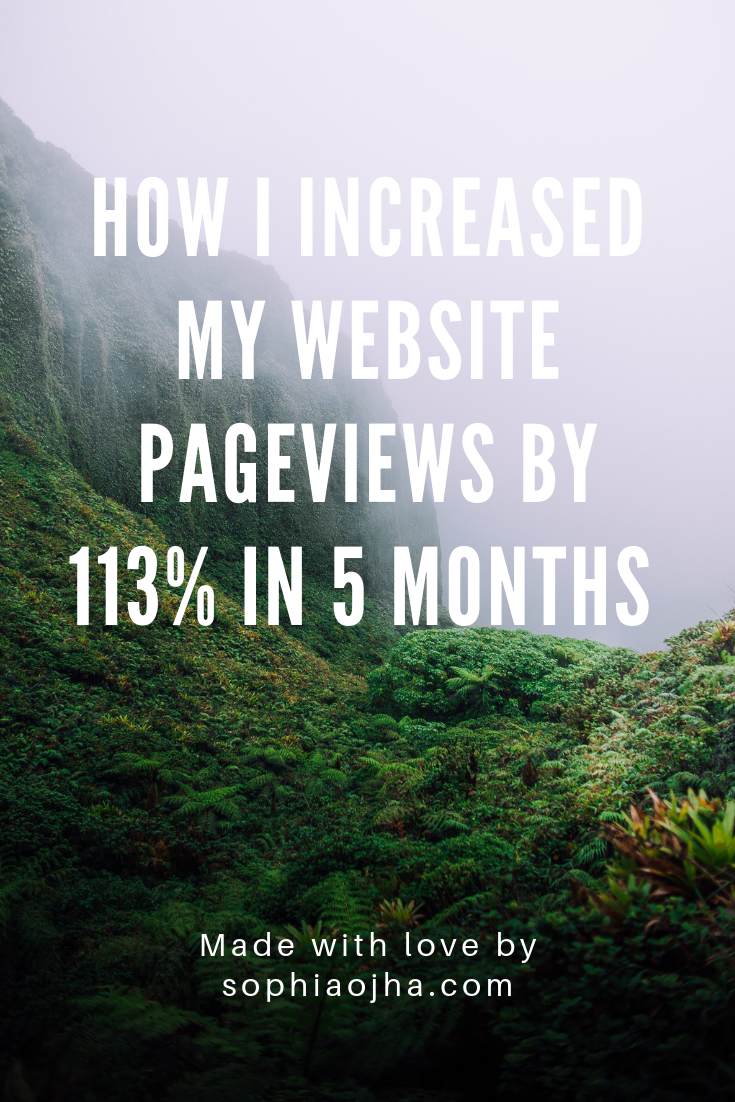
In this online era when it seems that every Tom, Dick and Harry looks up things on the internet for every aspect of their lives, it is inevitable that you would want a website for your business or organization. If you have a website with 3 to 5 pages describing your mission, presenting a way to be contacted and other general information, you are way ahead of the curve already. According to a survey conducted by research company, Clutch, a huge percentage of businesses in the United States still do not have a website. With a website, you now have an online presence and a digital business card that can be accessed from anywhere in the world at any time of day or night. Of course, I can help you create a beautiful site in 2 weeks or less.
Unfortunately, simply having a digital business card is no longer sufficient if you want to reach a wider audience, sell your services/products, enroll new members into your programs or fill the donation boxes of your non-profit organization. You need to have a content strategy for your website and regular content that’s periodically updated. I will tell you the benefits of having content on your site in just a second below.
What kind of content are we speaking about?
If you are not already creating content or are hearing this for the first time, you may be wondering, “Sophia, what do you mean by content and where do I start?”
By content, I mean any published material that informs your readers, potential clients, potential new members and any relevant stakeholders about your company or organization. This material can be in various formats including:
+ text articles also called blog posts,
+ videos (either in the form of tutorials, product presentations, interviews, event coverage and other visual content),
+ audio content such as podcasts
+ live webinar style trainings
+ or a combination of the above.
You start with one of these formats that best fits your current goals and business situation. Text articles are the easiest to begin with so if you are starting out make weekly blog articles your first goal. Regardless of what format you use, what is vital is that you create this content on a regular basis.
Your tasks:
1| Pick a content format (example: blog or video)
2| Pick a publishing schedule (example: weekly, biweekly or monthly)
3| Stick to it for 2 years to see results (super important)
The topics covered in your content can focus on a mix of themes that help your reader in some way. Ideas for content topics include:
1. Product/Service presentation/demonstration
2. Informing or educating your audience
3. In-depth studies that present a relevant topic in detail
4. Solve a specific problem (without the need of purchasing anything from your business)
5. Case studies of past clients/projects
6. Interviews with other users of your products or thought-leaders/experts in your industry
Types of content I create for my readers
I tend to create video and blog content on my site. My blog articles that are around 1000 to 4000 words. (The word count on this blog is 2688). My videos (also embedded on my YouTube channel) can be anywhere between 5 to 15 minutes long. Long-form articles have been known to be good for SEO but my aim is not to reach a certain number of words in each post but rather to focus on clearly presenting a certain topic or theme that is helpful to my audience. So as a rule of thumb, write as long or as short as you need in order to clearly and concisely solve a problem for your reader.
You will notice that on my website, I create content that:
1. Shows my readers how to technically use the Squarespace platform for building their website
2. Shows my readers how to leverage their website to build an email list
3. Shows my readers business lessons that I’ve learnt that can inspire them in their own business
4. Educates my readers on website-relevant themes such as SEO for increasing traffic, leveraging their website to save costs and growing their online business.
5. Demonstrates design tips for their online presence using free tools (for example: how to design an email header without Photoshop)
All in all, the aim of my content is to help online entrepreneurs and non-profits leverage their online presence to best serve their readers and clients and as a result to grow their revenue as well as create a positive impact for their communities.
The many side-effects and benefits of creating good content
Creating good content has many benefits, both for your business/organization and your clients or potential clients. It truly is a win-win approach when you make serving your readers the goal of your content, not serving yourself as the goal. I have a list of blog articles ideas that I routinely collect on my product management app, Asana, but when I sit down to write a new blog article or create a new video tutorial, I ask myself, “How can I help my readers today?” Then the right topic emerges. Asking the right question, as they say, is key to finding the right answers. Here are some specific positive side-effects of creating good, helpful content so that my readers and clients can:
1| Experience my teaching style: Potential workshop or course students can have a taste of my teaching style so they know what to expect when they purchase an online course or register for a live workshop.
2| Assess my skills before hiring me: Potential clients can see an archive of past content to assess if I have the skills and knowledge to solve their business/organization problems before they invest their hard-earned money to hire me.
3| Save money: My current clients can save money as they can find solutions through my archive of video tutorials and blog articles that solve their problems. They can follow the step-by-step tutorials and implement themselves or delegate to a VA (virtual assistant) so they can rather reserve their resources to hire me for more customized services. Alternatively, they can feel confident in hiring me to do the same knowing that I an effectively solve their problem.
4| Feel good about working with me: All of this builds the like, trust and know factor and my potential clients see my business as reliable, competent and integral and my current clients want to continue to stay working with me.
And we haven’t even mentioned the major SEO benefits that your content brings to your website, helping your business to be found by more people who need and want what your business/organization offers. Nor have we spoken about how this positively helps to grow your email list.
Create Beneficial, Useful Content
As I mentioned earlier, the more you focus on how you can help your readers/clients, the better it is for your business in the long run. For example, one of my clients hired me to teach her how to add a video to the banner of her website. Then a past workshop student emailed me asking me the same. So I saw that this was a topic that was in much demand, so I decided to create a blog + video on that topic which can be freely accessed by both by my current clients and potential new ones.
Not Richard Branson but I follow his philosophy
Some may ask, “why create content that shows something for free when you actually can be hired for doing the same thing?” My answer is simple. I am clear about my aim in my business and that is to be of service. My aim is to help my client. My client can watch the free video tutorial on YouTube and that helps her. But if my client writes me and says, “Hey Sophia, I saw your video on YouTube on how to add a video banner, can you implement that on my site? I have a million other things I need to take care of”. This has happened in real life where I made an in-depth video showing how to step-by-step achieve something and then one of my past clients emailed me. She wanted to hire me to implement the exact same thing for her business.
So now, I have helped my client by freeing up her time. That’s a very fulfilling feeling. Imagine how awesome it is to free up someone’s time - time that is such a rare and dwindling commodity that we all want more of. What good karma you’ve created for your own self by saving time for another business owner. And my aim to of service has been achieved in both scenarios (free content and being hired). Now, I am no Richard Branson who wrote in a recent article that he didn’t start Virgin to make money, rather to make a positive difference in people lives. But I hope you are following my motivation here clearly because this way of thinking will go a long, long way for your business and your own life.
How I increased my pageviews by 113% in 5 months by creating useful regular content
Seeing real data is the best proof! Creating good, regular content has been vital for an increase in traffic for my website. To give you some real evidence, I want to compare the first five months of 2018 to the first five months of 2019. Right now, we are still in the middle of 2019 so comparing all 12 months of 2018 to the five months of 2019 doesn’t make sense to me. Of course, the period June to December of 2018 had a compounding impact on stats for this year so this analysis is not without incompleteness. But it suffices for the point I am making here ⏤ publishing regularly will positively benefit your traffic.
[Jan 1, 2018 - May 30, 2018] Vs. [Jan 1, 2019 - May 30, 2019]
The screenshot below is from my Squarespace Analytics page where I can see the traffic information for my site for the period of January 1st, 2018 until May 30th, 2018 (the first five months). And then below it, you will see the stats for the same time period in 2019 - Jan 1st till May 30th.
Here are the 2018 stats for the first five months:

And now compare, my 2019 stats for the first five months:

You can see that my site generated:
2018
Jan to May
1,646 Unique Views
2,017 Visits
3,962 Pageviews
2019
Jan to May
3,808 Unique Views
3,914 Visits
8,448 Pageviews
You can check your own website traffic stats by visiting your dashboard and navigating to the Analytics> Traffic panel.
Clearly, all three data points saw an increase. When I calculated the percent increase, I found that my website had landed 113% increase in pageviews for the 5 month period that we are comparing here.
To calculate percentage increase, you first figure out the difference between the old and the new data, then divide the difference by the old number and then multiply by 100.
Unique Visits
3808-1646 = 2162
2162/3808= .567
.567*100 = 56.77
57% increase in Unique Visits
Visits
3914-2017 = 1897
1897/2017= .94
.94*100 = 94
94% increase in Visits
Pageviews
8448-3962 = 4486
4486/3962= 1.13
1.13*100 = 113
113% increase in Pageviews
So you can see that for all three data points, my website generated a double or triple digit increase: 113% increase in Pageviews, 94% increase in visits and 57% increase in Unique Visits.
The simple way to increase traffic to your site: blogging consistently
To try and make some correlation of the increase in my stats with the content I published, I reviewed my Blog Archive to see how much content I published for the same time period (Jan - May) in 2018 and 2019:
2018 Blogs + Videos
4 Blogs from Jan to May
14 total from Jan to Dec
2019 Blogs + Videos
17 Blogs from Jan to May (18 counting this blog post)
? total from Jan to Dec (we are still in May 2019)
Comparing my content creation for 2018 and 2019
So here you see, that for the 2018 time period (Jan-May), I published 4 blog articles and videos whereas in 2019 (Jan-May), I published 17 blogs. That’s 13 more blogs published in the same time period. In fact, that’s more than what I published in the entire year of 2018 (annual total of 14 blogs).
I created four times as much content than the prior year to yield 57% increase in Unique Views. My goal was to create weekly blog + video in 2019 so I should have actually published 21 blogs by May but instead published 17 till now (18 if you count this post which was published on the last Thursday of May). I am still missing 3 posts from my 21 goal and that’s because I missed on content creation in the whole of March and the first part of April due to an unexpected surgery that put me in bed for 4 weeks. Considering all that, I am pretty happy to have 18 published articles this year so far ⏤ a majority of which are long-form articles plus most of them come with a video tutorial. I really gave it my all! :)
Compare yourself with yourself; not with others
Now for some of you these stats may be too little or too big. But that’s irrelevant to me. I have spent far too much time comparing myself to others and it has only pulled me down. The mind wants to compare ourselves with others’ journey but there’s really nothing to compare. We are all on our own unique journeys and although we can be inspired by the success of others and celebrate with them, we mustn’t measure our worth by comparing with others. We need to make our own experiences and learn from them. It is helpful rather to look at the path we have taken and how far we have come. Mistakes are learning lessons and indicators of what we need to change in the future.
The stats I shared with you today are by far not anywhere close to where I want my website traffic stats to be at but what’s important is that I can see how much progress I have made already and have assessed what exactly led to it. Publishing regular content this year has yielded a 113% increase in my Pageviews and that’s a stat worth noting as I continue my content creation plan of action for the rest of the year. Now for me, it is just about following what works and doing it consistently while keeping eyes on my own path.
My biggest lesson ⎯ Publish Useful Content Weekly
In summary: That in a nutshell is my biggest lesson. Focus on helping your readership. Focus on creating useful content. Publish weekly. Look at your own path of progress. I hope you, too, will be inspired by this blog and what I’ve shared today and will begin work on crafting your very own content strategy or redesigning an existing one.
Your Turn:
What do you think of the message in this blog article? Do you have a content strategy? If so, what format do you publish in and what topics do you cover? Chime in, in the comments below. I’d love to hear from you!
~ Sophia
067: Three things you should know about doing a live workshop series
Recently, I conducted a three-part live workshop series (90 minute each) called “Host Your Course”. I enjoyed doing it very much but also learned some important lessons. I’ve decided in which scenarios I would use a live workshop method and in which scenarios I’d rather use the online course method. I share all of that in this blog article to help you in your business when it comes to creating paid information products.
Recently, I conducted a three-part live workshop series (90 minute each) called “Host Your Course”. I enjoyed doing it very much but also learned some important lessons. I’ve decided in which scenarios I would use a live workshop method and in which scenarios I’d rather use the online course method. I share all of that in this blog article to help you in your business when it comes to creating paid information products.
Three Lessons I learnt from doing a live workshop series

I will break down my top 3 lessons for you but before I dive into it, a word on why I chose a live workshop method.
Four Types of Online Teaching Methods
When it comes to creating a paid information product online that teaches something to your students, you have a multitude of options:
1. You can create an ebook/PDF
2. You can create an audio course
3. You can create an online course that includes video, audio and PDFs
Or:
4. You can do a live online workshop
The Live Workshop Method (and why I like it)
The Live workshop method entails setting up a workshop online using one of the many conferencing platforms such as GoToWebinar, Crowdcast or Zoom which is my preference). These are affiliate links.
You set up a live session, send over the video call link to your students via email or place it on a course home and then, at the set date and time, you do the live training. My live workshops include both a slide presentation as well as a live demo on the Squarespace platform. I love Zoom because it allows me to record the presentation with ease and do screenshares without going into a crazy picture in picture mode (like it happened to me when using Crowdcast). Zoom also saves me a copy of the chat interaction so after the workshop is over I have the chance to review any questions or comments from my students.
Good for the instructor: I really enjoy the live workshop method because I get instant feedback from my students while I am teaching something. I get to learn at what parts during the workshop a question came up for my students. This way I can improve my presentation, clarify the message or demonstrate the skill better. It is a great learning tool for me as an instructor to refine my material and teaching style by listening to my students’ questions and needs during the workshop.
Good for the student: This style is enjoyed by the students for the instant feedback aspect as well. They join the session live from anywhere in the world as long as they have good internet access and they can ask questions via video (optional) or in the chat box. While I am showing something on the backend of my Squarespace site or a demo site, they can ask a question to clarify something and right away get the answer instead of having to move through the material with lingering questions in their mind.
This method has worked very well for my 90-minute interactive live workshop, Squarespace Fundamentals which I have been holding several times a month since May of 2018. So I decided to use the same method for my 3 part live workshop series Host Your Course as well. And here’s what I found:
The obstacles I ran into when hosting three live sessions of Host Your Course
Because I enjoy the live interactive format as the instructor for Squarespace Fundamentals, I decided to use it for my larger training Host Your Course as well. It was a good thing that I gave the live workshop method a try but when I launch this course again, it will be in a different format (I explain why below).
When I held the three-part live workshop series, I ran into these obstacles:
Obstacle #1 The microphone (despite being a brand new one) had a glitch that showed up only in the recording. The audio kept repeating certain phrases during the entire training which doesn’t make for a good user experience. I couldn’t fix this as I found out only after the session was over. I have to go back and redo the entire session for my students so they can have a good recording to watch later on.
Obstacle #2 Because the live trainings happen on a specific date and time, any emergencies or calendar conflict would derail the workshop. In my case, I had double booked on the third and final session. I had to pre-pone the workshop but that means if students can’t make the new date, it’s not fair to them as they committed to the date I had initially announced. I learned from this experience that doing live sessions demands a lot from me and if there’s any emergency or a scheduling conflict, I will run into further issues.
Obstacle #3 I ran out of time in one of my 90 minute session while didn’t have enough material to fit one of the other 90 minute sessions. Because I was doing this three-part live workshop by following a theme, I divided up the three sessions by topic, not realizing that in practice, demonstrating the first part would take more than 90 minutes. On the other hand, one topic took up only 30 minutes. So this was out of proportion and not quite a smooth process as I’d like to have. Of course, I could have planned this better and done some test runs to find out I had only 30 minutes of content but I didn’t do it and now I learn from it.
3 Learning lessons from the live workshop series method experience
So although the live workshop method is great for a one-off 90 minute training like Squarespace Fundamentals, it doesn’t work for a longer training like Host Your Course that is spread over three weeks as it didn’t allow me room for fixing tech issues, for dealing with life and business emergencies or errors (like double booking), and for harmonizing the amount of content that can be taught in each session. The online course method (with pre-recorded content) is what I’ve decided to go with when I launch Host Your Course next time.
The Online Course method is great because:
1. Tech problems can be fixed easily: If a microphone fails or I run into other tech issues, I can simply go back and fix it. When the content is pre-recorded I can check the tech with great fluidity and correct any issues, before the content goes live. This is much better user-experience and better for the learning experience for my students.
2. It’s more forgiving when running into emergencies or scheduling conflict: If I have to take care of something out of the blue one afternoon while preparing the recorded materials, I can easily move my schedule into the evening or the next day. This is not something I can do when I have a pre-determined time and date for a live workshop. Doing an online course with content that’s pre-recorded gives the most flexibility when you also have other responsibilities that suddenly want your full attention (parents with little kids know this well).
3. It allows for better content planning: When I have the content recorded, I can have as many lessons as needed within each module to cover the points I want to cover. If one module has 3 lessons and another has 5, it’s not an issue at all. The content is still arranged by topic and has greater cohesiveness than what I experienced in a live workshop mode where one session had only 30 minutes of content, for example.
My biggest lesson ⎯ Be kind to yourself
In summary: I hope that when you think of turning your knowledge and skills into a paid information product, you will consider my experience in hosting live workshop series. The live format is great of a one-off 90 minute trainings but an online course with recorded material works well for a more in-depth training.
In the end, it’s important to try things out, reflect and learn from it and give yourself a break. Don’t be too hard on yourself when things don’t go smoothly or as planned - that’s life and all we can do is be kind to ourselves, learn from our experience and give it another shot. :-)
Your Turn:
Chime in your thoughts in the comments on what approach you’ve used and what you will consider for your next online information product. I’d love to hear from you!
066: How to find and fix broken links on your website
One of the ways you can improve the user-experience and ranking of your site is by fixing broken links. In this blog, I will share what are broken links, why they are bad for your website/business, how to find them and how to fix them.
One of the ways you can improve the user-experience and ranking of your site is by fixing broken links. In this blog, I will share what are broken links, why they are bad for your website/business, how to find them and how to fix them.
How to find and fix broken links on your website?
What are broken links and how do they happen?
Broken links are links on your website that lead to a ‘404 error’ page or do a ‘page not found’ page. Essentially, that means when someone click on a link it leads to a dead end. That’s why they are also called “dead links”. There are several “innocent” reasons for broken links:
1. It may be that there was simply a typo and a link was typed in incorrectly.
2. It may be that the external website that was linked to, is not longer active.
3. A program or an event that your organization once hosted, is not in offer anymore.
4. It may be that a domain name is no longer in use or was changed.
In fact, there’s been research done that leads to the conclusion that about every seven years, your website is prone to lose 25% of its links. This is called a “link rot” and there’s a natural tendency of sites to do this according to Maciej Cegłowski.
Types of Broken Link Error Codes:
400 Bad Request
401 Unauthorized
403 Forbidden
404 Not Found

Why are broken links so bad?
There are two reasons why broken links are not so good for your website.
1. Broken links hurt your SEO rankings.
Your website ranks higher in search engine results such as Google or Bing when it’s considered to a healthy, value-giving website. One of the factors that contribute to your search ranking is whether all links lead to where they promise to lead you. When you click on a link and it goes to an error page, you hurt your SEO (Search Engine Optimization) and that’s clearly not a good thing for your website.
2. Broken links give a poor user-experience to your site visitor.
Another way broken links hurt your website is by giving a poor user-experience to your site visitors. If someone looking for something on your site clicks a link that yields nothing a broken link, it not only affects how professional your site is perceived by the visitor but it ultimately wastes their time and they may immediately jump off your site. Thankfully, this is something you can fix either by investing your own time or hiring a professional to fix. (Hint Hint: You can hire me by the hour to clean up the broken links on your site).
What can you do to fix broken links?
The way to fix broken links is to find them and correct them periodically. You can use free or paid tools. Here are some free tools to get you started:
1. Dead Link Checker: https://www.deadlinkchecker.com
2. Broken Link Finder: https://brokenlinkfinder.com/
3. Dr. Link Check: https://www.drlinkcheck.com
4. Broken Link Check: https://www.brokenlinkcheck.com/
5. Also check out this Ukrainian link checker tool: https://sitechecker.pro/broken-links/
I recommend using all four of these (free) tools. Last week, I used one of them and cleaned up all my broken links. I came back to write the blog and plugged in my domain name into the remaining three and still found some new broken links.
So I hope that this article is helpful to you and you will go and test out your website for broken links. I’d love to know about your experience so chime in the comments if you found any of the above links helpful.
065: Why you should batch process everything you can in your business
One of the best things I learnt about running a business is the importance of creating good content for my audience. It is a powerful way to make a connection with exactly those people who are looking for solutions that your content can help solve. Email makes if possible to keep your business “top of mind” for your readers/clients.
The other best thing I’ve learnt is to organize and streamline my business activities using batch processing. This can be done very easily using automation tools that are already in place. Case in point: scheduling out emails in advance.
The many benefits of batch processing
There are many benefits to batch processing your activities in your business. Let’s take the example of batch processing your weekly emails to your lost:
|1 Frees up your time
You can easily free up your time when you schedule out your emails in advance. If you are sending emails four times a month, but you write and schedule them out in one sitting, that saves you at least 4 times of opening your email marketing platform, going to the right section and creating a new email. If you are not using that email platform everyday, you have to re-acquaint yourself with the system each time. Rather, re-acquaint yourself once a month and then write it all up at one go.
|2 Take advantage of flow
You may have heard about the state of flow - the mental state of mind that happens when you are in your zone of genius. Well, this flow also happens when one is getting into the groove of a particular project. For example, when I start writing, at first I may be at a loss of how to begin. But once I begin writing, more ideas come and I have not only completed that one blog post, but I am already writing the next one. This same magic can happen during your email writing session. This way you simply get a lot done faster and get it done in a state of flow instead of in a state of fighting writer’s block four times a month (4 times in the scenario when you are sending out one email a week and writing them individually each week).
|3 It helps you feel a sense of accomplishment
At least, that is what it does for me. When I have 4 emails and 4 blog posts all ready to go a month in advance, I feel so good about my productivity and creative output. It allows me to then go on and create more content or focus on another project without interruption. This is a feeling I think every solopreneur/business owner should have a taste of - the feeling of “being ahead” of one’s to-do list. I love that feeling and batch processing gives me that.
|4 It allows you to put out content consistently even if you face a difficulty
This one is personal. Just last month, I realized how important it is to have video + blog content along with the weekly newsletters scheduled out. You see, I faced an unexpected hospital visit and I had to undergo surgery. The recovery process took a full three weeks when I could not do anything in or for my business. Plus the fourth week after the surgery when I slowly came back to my desk, I felt so exhausted that I didn’t get a lot accomplished. It was only in the fifth week that I got back on my feet fully.
Thankfully, back in February, I had created 4 videos , 4 blog posts and 4 emails, all of which I had scheduled out for March. This way, in March when the unexpected hospital visit and surgery came, I could completely focus on my rest and recovery. Boy, was that a relief to have everything scheduled out.
I only missed on sending out content the week when I came back to work. But you know what, given my health circumstances, I can live with that. And I know my audience is kind and compassionate enough to not mind me missing out on one week’s worth of content. After all, I have over 60 videos and blog posts on my website that they can still go and make use of.
This 4th point is probably the most important benefit. And it doesn’t have to be health issue. What if you wanted to take August completely off or December completely off from your business. Well, you can still build up SEO points and heart-points with your audience by sending them useful content that you schedule out for them in advance.
How to Batch Process?
There are several ways you can go about this.
1. Pick a day for a specific task:
One of my fellow web designer based out in Canada, uses a weekly system. For her, Mondays are content creation days. You can do this too. Plan to do a specific task on a specific day of the week each week. This also helps create a nice timetable for you to follow so you know what you are doing each day of the week. This does require some good planning and you will surely, need to try it out and adjust it to how you work.
2. Follow a workflow:
What I like to do is use a workflow that works best for my style of working. For example, my workflow is a synergized plan that includes video content creation, blog article creation and newsletter creation. Depending on the topic of my blog, I first either shoot the video or write out the step-by-step plan. Sometimes I like to write out the article so I know what to do in the video. At other times, it is easier for me to show the steps in a video and then I write it out as a blog.
I like the second method because it allows me to start a workflow whenever I like. I can do this before or after a client project and this way I have a bit more flexibility to accommodate my clients when it comes to matching our schedules for video call consultations. I can also break up the workflow in part 1 and part 2 and still have the “batch process” effect. I’ve tweaked this process as it fits my working style and my business over the last 2 and a half years. I recommend you giving it a try and as you do it, you will find out what works best for you.
So the workflow method works for me. Do what works for you but batch process.
Are you getting excited to get your own website? I love designing websites for fabulous people like yourself, so take action to get your website design process started —> Start the Conversation by sharing some ideas about your site with me.
Questions about this blog post? You can drop them in the comments below!
~Peace,
Sophia